Controlling Siri from XCTest using XCUISiriService

Apple has released new Xcode 8.3 beta 2 with new Swift 3.1 snapshot which is available to download from Apple developer account. There are lot of new things in Xcode 8.3 beta 2, you can read release note if you have Apple developer account. There is a handy class added to the XCTest framework to enable interaction with Siri with XCUI Test which is XCUISiriService. In this post how to enable interaction with Siri.
Xcode 8.3 beta 2
Newly added class XCUISiriService is available in Xcode 8.3 beta 2 which is currently available for the download if you have Apple Developer Account. You can get it from the Downloads section of the developer account. Xcode 8.3 needs macOS version 10.12 and above. You can download compressed XIP file which is around 4.52 GB. If you already have previous version of the Xcode then remove it or you can keep it but you have to switch between Xcode DEVLOPER_DIR. Once downloaded you can extract the file to install Xcode 8.3 beta and wait for installation of Xcode and command line tools. Once Xcode 8.3 beta 2 is fully installed with all the command line tools, we can drag it into /Applications path. Now, we have to switch to the new Xcode version by running following command
|
1 2 3 |
$ sudo xcode-select --switch /Applications/Xcode-beta.app/ |
This will set new DEVELOPER_DIR and we are ready to use Xcode 8.3. Make sure you are using correct toolchain using xcrun --find swift command which will shows current tool chain you are using.
|
1 2 3 4 5 |
$ xcrun --find swift /Library/Developer/Toolchains/swift-3.1-DEVELOPMENT-SNAPSHOT-2017-01-22-a.xctoolchain/usr/bin/swift |
Now, make sure you export toolchain and using correct version of Swift which is Apple Swift version 3.1-dev at the moment. You can easily do that by running following commands.
|
1 2 3 4 5 6 7 |
$ export TOOLCHAINS=swift $ swift --version Apple Swift version 3.1-dev (LLVM 40fb70e1b6, Clang 658ce8b57d, Swift d6c7fe1067) Target: x86_64-apple-macosx10.9 |
This will ensure that you are using Swift 3.1. Now we are good to try new features of XCTest Framework.
XCUISiriService
The XCTest framework now has new class XCUISiriService which has ‘activate’ method which takes string ( voice recognition text) and pass to Siri. This string is then processed by Siri and return the result. The siriService is a part of XCDevices class and can be used as
|
1 2 3 |
XCUIDevice.shared().siriService.activate(voiceRecognitionText: "Open News") |
Let’s cover how to use the XCUISiriService to interact with Siri by creating a sample application with few tests.
Create Xcode Project
Let’s create new Xcode project as iOS app with unit and UI testing templates and name it XCUISiri . Now that, we should have default iOS app with template UI tests code.
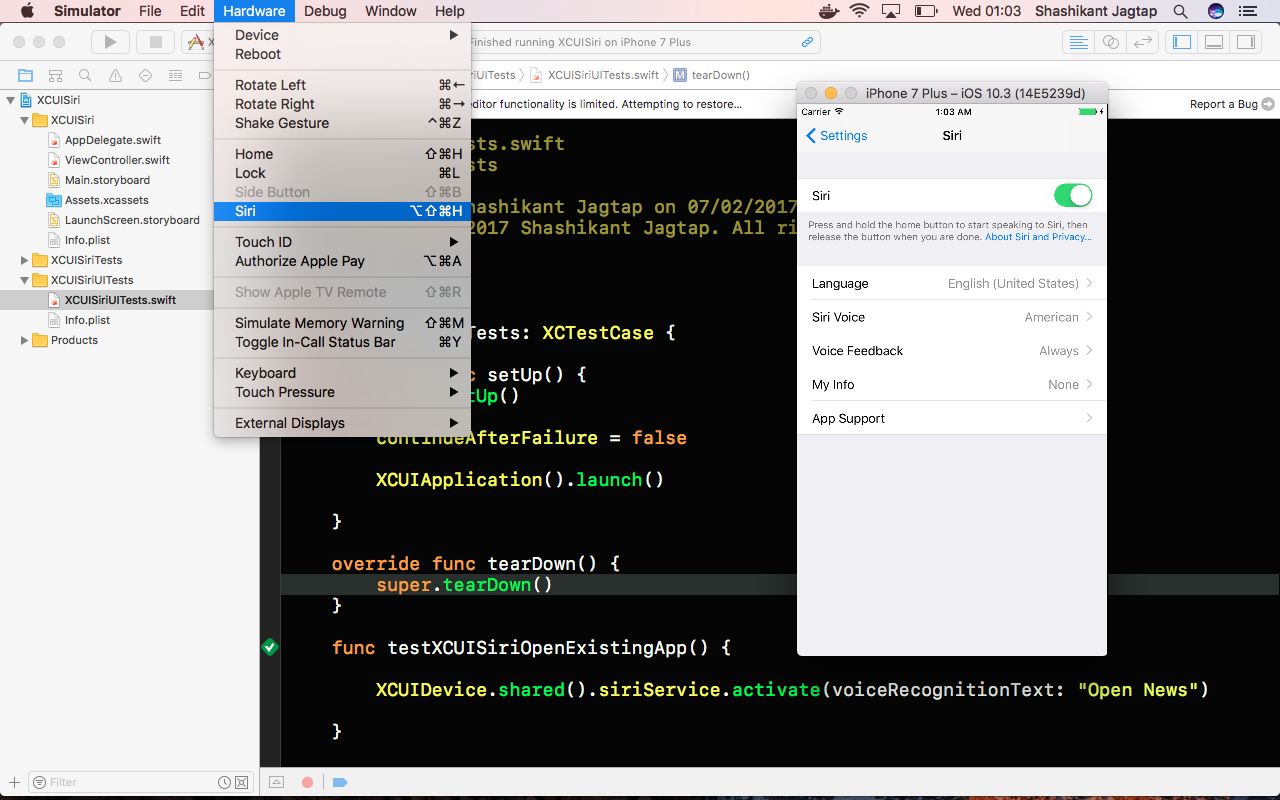
Enable Siri from Device/Simulator
Now that we have to enable Siri from Simulator or real device. Let’s enable it for Simulator by Selecting ‘Hardware’ menu and Select Siri. In the simulator, we can enable Siri from the settings menu as shown below.
Run Tests
Now we are all set to try new XCUISiriService. Let’s add one more test to use XCUiSiriService.
|
1 2 3 4 5 6 7 |
func testXCUISiriOpenExistingApp() { XCUIDevice.shared().siriService.activate(voiceRecognitionText: "Open News") } |
We can easily guess that the code above is telling Siri to open Apple ‘News’ application. Let’s run the test by pressing cmd+U
You can watch that, tests has opened Siri app and passed ‘Open News’ string to it. Siri then act on it and opened Apple News app. In this way we can literally pass any string to Siri and let the Siri act on it.
Potential Benefits of XCUISiriService.
There might be potential benefits we can get out of this XCUISiriService class in XCUI Tests. Here are some possibilities
- We can use Siri open an app (potentially ) ?
- We have ability to automated every automate everything that Siri can and many more
Github Source Code
- You can get the repo from Github XCUISiriServiceDemo it yourself, make sure you have Xcode 8.3 beta and latest Swift toolchain.
|
1 2 3 4 5 |
$ git clone https://github.com/Shashikant86/XCUISiriServiceDemo/ $ cd XCUISiriServiceDemo $ open XCUISiri.xcodeproj |
Conclusion
The new class XCUISiriService in the XCTest exposed ability to automate Artificial Intelligence (AI) related tasks with XCUI Tests. Hopefully we will get some more insight once Xcode 8.3 stable version is released.